
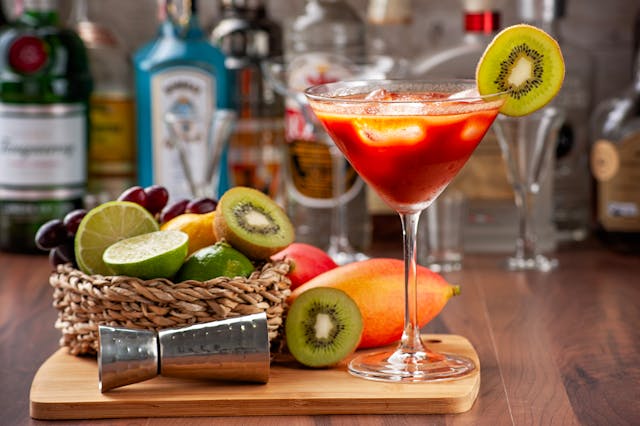
Have you ever had this experience? You excitedly open YouTube, buy all the base spirits, lemons, and syrups recommended by a master bartender, and eagerly look forward to crafting a sophisticated cocktail at home. But after taking a single sip… Wait, what? Why is the alcohol harsh and stinging, or watered down like diluted sugar water, or even tainted with a strange medicinal aftertaste?
When you followed the recipe and ratios down to the last detail, why do your homemade drinks fall so short of a real bar?
Don’t be discouraged—it’s definitely not a skill issue! While mixology might look like “just pouring liquids together and stirring,” it actually hides a wealth of science, physics, and sensory experience. Today, we’re going to dissect the key differences between Home Bartending vs. Professional Bars across ingredients, ice, technique, and ambiance, complete with beginner-friendly tips to turn your drinks around instantly!
Key 1: The Ignored Soul—”Ice” Is the Skeleton of a Cocktail
When discussing why homemade cocktails taste bad, beginners often focus solely on the spirits, overlooking the element that takes up the most volume in the glass: ice.
Ice in bars is usually crystal clear, large, and extremely dense. Ice from a home freezer, on the other hand, is often cloudy, small, and melts quickly (“soft ice”). This leads to two fatal flaws:
Melts Too Fast: Small or low-density ice melts rapidly during shaking or stirring, resulting in over-dilution that leaves the drink feeling flat and watery.
Absorbs Freezer Odors: Home ice easily absorbs smells from meat or seafood stored in the freezer, directly ruining the cocktail’s aroma.
💡 Beginner Game-Changer:
Ditch the small home ice trays! Buy large bags of pure ice blocks from a convenience store, or use the cooler method to make your own “clear ice.” Large, slow-melting ice cubes provide proper chilling while giving you precise control over dilution.
Key 2: Close Doesn’t Cut It—Eyeballing vs. Precise Measurement
In a professional bar, no matter how fluidly a bartender moves, you’ll always see them holding a double-ended metal measuring tool (jigger). At home, however, we often rely on “vibes”: “Pour gin for two seconds, squeeze half a lemon, add a spoon of syrup…”
This “free-pouring” habit is a major trap for beginner mixologists.
Mixology is a precise liquid experiment centered on balancing sweet and sour. A difference between 15ml and 22.5ml of lemon juice may seem subtle, but its impact on the glass’s acidity is night and day. Too much acidity drowns out the spirit’s aroma; too much sweetness leaves a sticky, harsh mouthfeel.
💡 Beginner Game-Changer:
Invest in a professional jigger. Build the habit of measuring every single drop. Even for an extra 5ml of syrup, stick to the standard recipe first—this is step one to achieving consistent quality.
Key 3: Stop Using Juice Concentrates! Ingredient Freshness & Syrup Differences
Why is a bar’s Whisky Sour smooth and balanced, while yours tastes like chemical lemon tea? The answer lies in freshness and syrup ratios.
The Devil in Lemon Juice: Bottled lemon juice concentrate contains preservatives and artificial sourness—it can never replace freshly squeezed juice. Fresh citrus contains natural essential oils and volatile aromatics, which are the very soul of a cocktail.
Syrup (Simple Syrup) Density: Many people substitute cocktails syrup with supermarket honey or fructose. Professional bars use “standard syrup” boiled with exact ratios of water to sugar (1:1 for Simple Syrup, or 1:2 for Rich Syrup). Syrup density affects not just sweetness, but the mouthfeel and texture of the drink.
| Ingredient Category | Professional Bar Practice | Common Home Mistakes | Improvement Tip |
| Citrus Juice | Squeezed fresh daily, pulp strained | Store-bought concentrate / Leftover overnight juice | Always use fresh lemon or lime juice squeezed the same day |
| Syrup | Homemade 1:1 or 1:2 sucrose syrup | Store-bought fructose / Random granulated sugar | Heat equal parts water and sugar until dissolved; cool before use |
| Base Spirits | Curated brands matching cocktail profiles | Whatever cheapest spirit is lying around the house | Pick well-reviewed, accessible standards (e.g., Beefeater, Bacardi) |
Key 4: Shaking Isn’t Just Style—It’s the Physics of Temperature and Aeration
Watching bartenders on YouTube or TikTok shake drinks looks effortlessly cool, so you grab a thermal flask, shake it a couple of times, and pour it out?
Shaking serves three main purposes: chilling, diluting, and aerating (creating tiny air bubbles).
Juice-heavy cocktails like a Daiquiri or Gimlet require high-impact collisions to force air into the liquid, creating a velvety, rounded texture. Conversely, spirit-forward drinks like a Manhattan or Negroni require a gentle stir with a long spoon to preserve clarity and rich body.
If you stir what should be shaken, or violently shake what should be stirred, the mouthfeel will naturally suffer.
💡 Beginner Game-Changer:
Get a basic shaker and a fine mesh strainer. When shaking, pack the shaker with plenty of hard ice and shake vigorously for 10–12 seconds until frost forms on the outside. Pouring through a fine strainer catches small ice chips, resulting in a smoother texture.
Key 5: Proper Tools for the Job—The Minimum Home Bar Kit
You don’t need to convert your living room into a full home bar, but making high-quality cocktails with just a mug and a tablespoon is tough. To break the beginner curse, these basic tools offer maximum value for money:
Jigger: For precise recipe measurements.
Shaker (Boston or Cobbler): To blend juices with spirits and achieve optimal chilling.
Bar Spoon: Long-handled design for smooth stirring and layering.
Strainer & Fine Strainer: To filter out ice shards and pulp.
Proper Glassware: Coupe, Highball, or Rocks Glass. A glass’s thickness and shape directly influence how the liquid enters your palate and how aromas concentrate!
Key 6: Psychology & The Five Senses—The “Brain Trick” of Bar Ambiance
The final often-overlooked factor comes down to your senses and psychological expectations.
In a professional bar, dim warm lighting, curated jazz or lo-fi music, heavy high-end glassware, and friendly bartender interactions quietly elevate your sensory experience (Crossmodal Perception).
When making a drink at home, you’re looking at bright fluorescent lights, dirty dishes in the sink, and the messy process of squeezing lemon juice everywhere. Your brain’s expectations for that drink drop automatically.
💡 Beginner Game-Changer:
Sense of ritual is the best seasoning! Once your drink is ready, dim the lights, put on some music, pre-chill your glass, and finish with a citrus peel twist over the top of the drink. Expressing fresh essential oils into the air instantly elevates the home drinking experience by a whole level.
Summary: The Beginner’s Home Mixology Comeback Checklist
To summarize, turning homemade cocktails from medicinal messes into bar-quality creations takes just 5 small adjustments:
Upgrade your ice: Swap small cubes for store-bought block ice or homemade clear ice.
Measure precisely: Get a jigger and say goodbye to eyeballing.
Stick to fresh ingredients: Use only freshly squeezed juices and homemade standard syrup.
Master technique: Shake juice drinks hard; stir spirit-forward drinks gently.
Build a sense of ritual: Pre-chill your glass, add a citrus twist, dim the lights, and enjoy your creation.
Mixology is a fun, rewarding art of living. Once you master these Bartending Basics and their underlying principles, you’ll realize crafting a top-tier cocktail at home is far simpler than you thought. Tonight, why not pick a classic Gin & Tonic or Daiquiri and give it another shot?
